PT Reveals 8 Perfect Moves For People Who Can't Touch Their Toes
"If you are tight, if you're stiff, if your body is not very flexible and you'd like to improve your mobility, you're in the right place," says Dr. Jared Beckstrand, PT, DPT. No extreme poses or complicated movements—just simple, effective stretches designed specifically for people who struggle with flexibility.
Dr. Beckstrand is a Doctor of Physical Therapy specializing in making mobility accessible to everyone. Through his practical approach to stretching, he's developed this 8-minute routine that addresses all major muscles and joints without requiring any equipment. His emphasis is on comfort over forcing difficult positions: "It's important that you should keep your stretching very comfortable. I want you to push to the point where it starts to get painful, but I don't want you to push into pain."
Start With Lumbar Rotation For Lower Back Relief
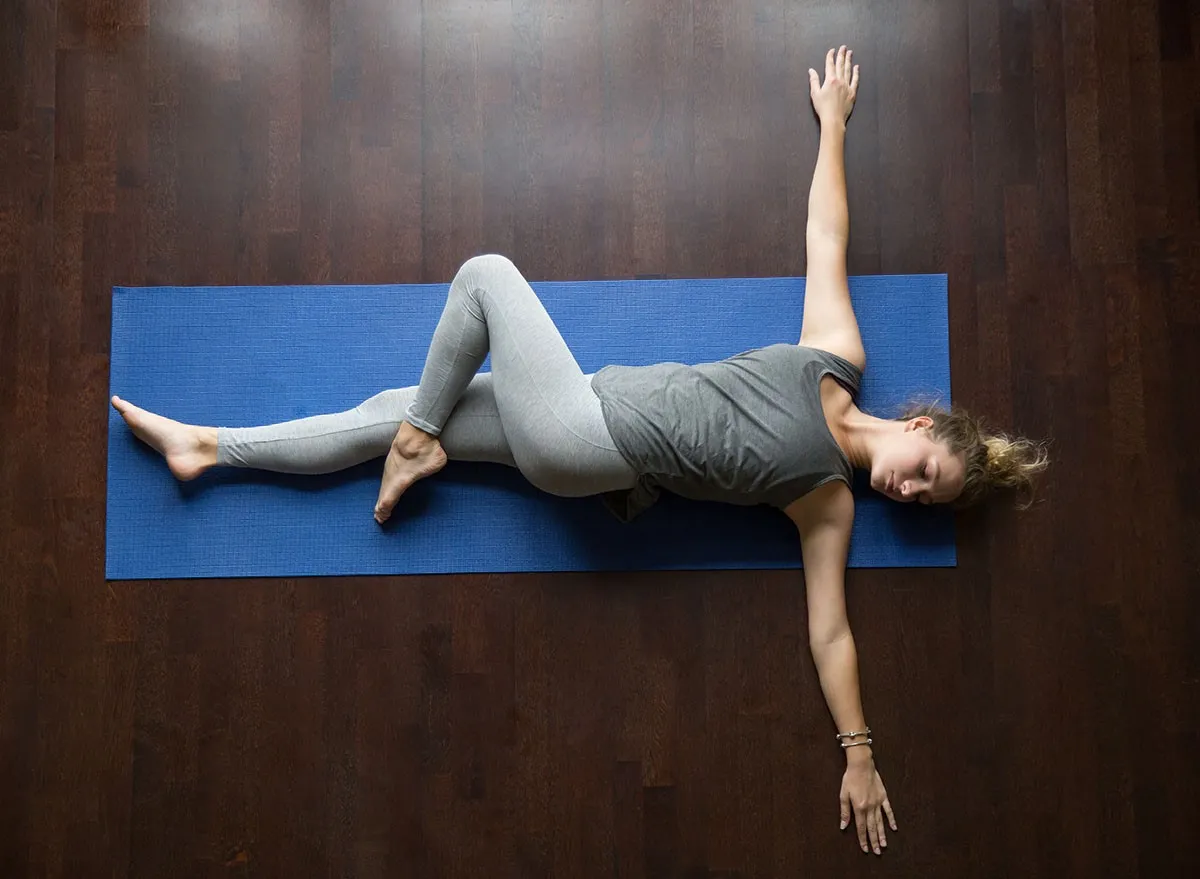
Begin by lying on your back, as Jared instructs in his post: "Lay on your back with your right knee bent. With your left hand, grab the outside of your right knee and pull that over to your left side until you get a good comfortable stretch through your lower back and through your hip." Hold for 30 seconds, then repeat on the opposite side.
Simple Hamstring Stretch For Tight Legs
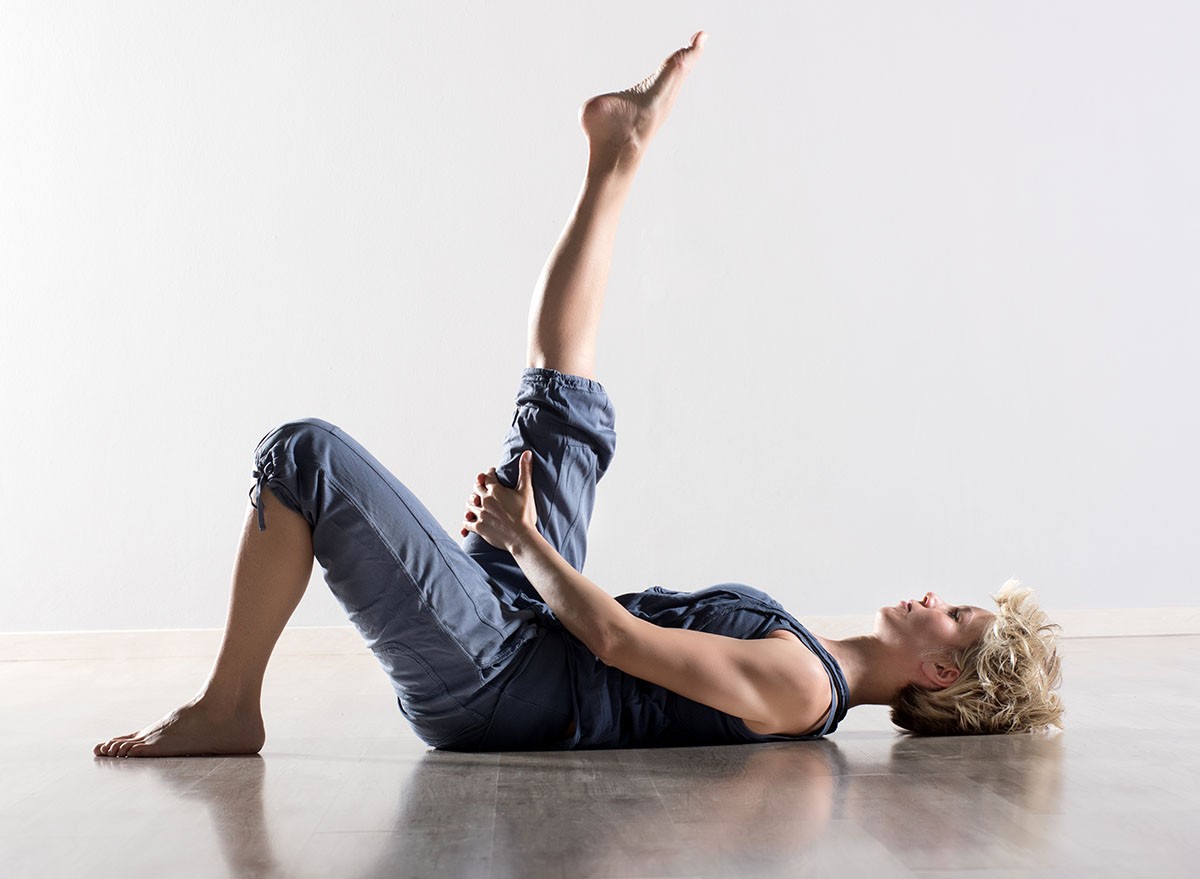
"Left leg goes straight, both hands cup right behind the right knee, and then straighten that knee out until you get a good stretch right up here in the hamstring," Jared demonstrates. This straightforward movement targets one of the most commonly tight areas in the body.
Easy Hip Opener With Piriformis Stretch
For this hip-focused movement, Jared explains: "Cross your right leg over your left knee, grab your left knee and pull it up towards your chest until you get a good stretch in that right hip." Switch sides after 30 seconds for balanced flexibility.
Hip Flexor and Hamstring Double Stretch
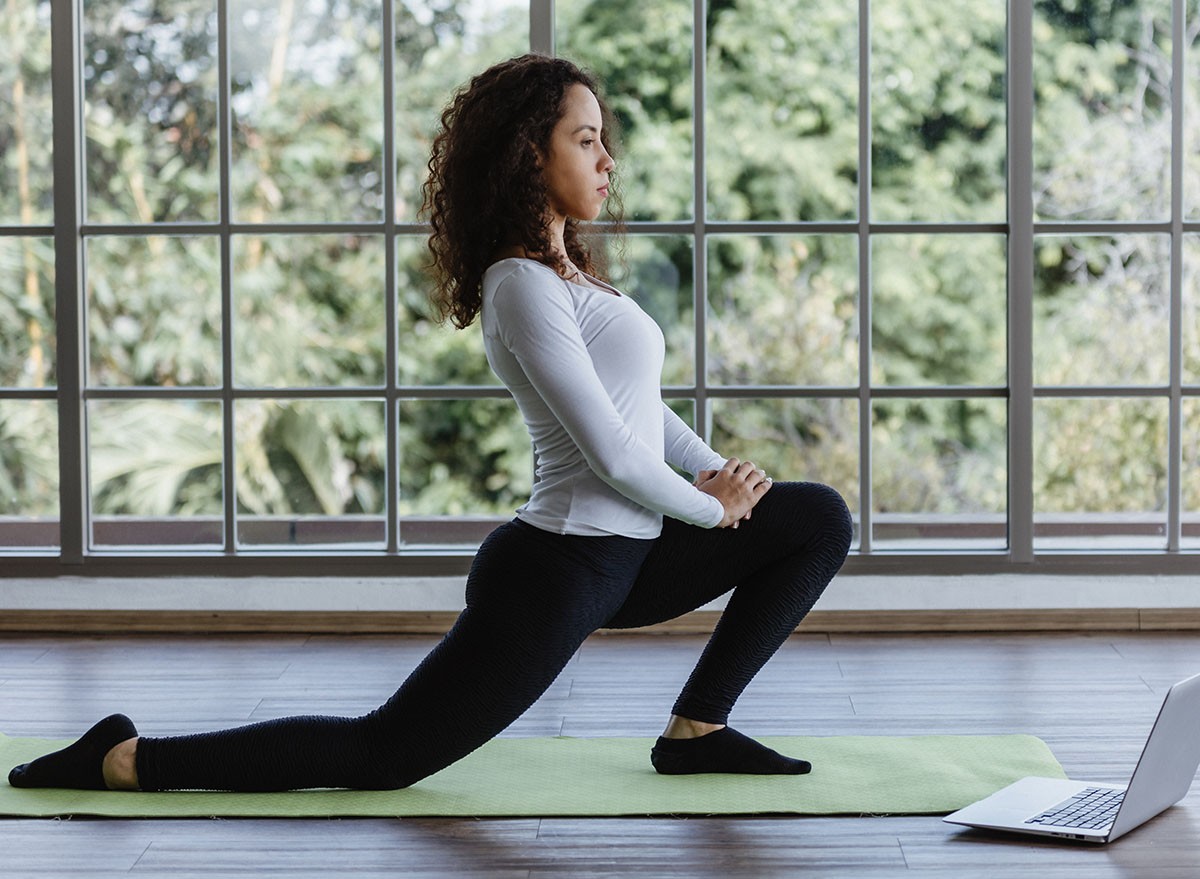
"Put your right knee on the ground. Take a big lunge step with your left foot, scoot your weight forward onto that left foot," Jared guides. This combination stretch targets both your hip flexors and hamstrings efficiently, making it perfect for people with limited time.
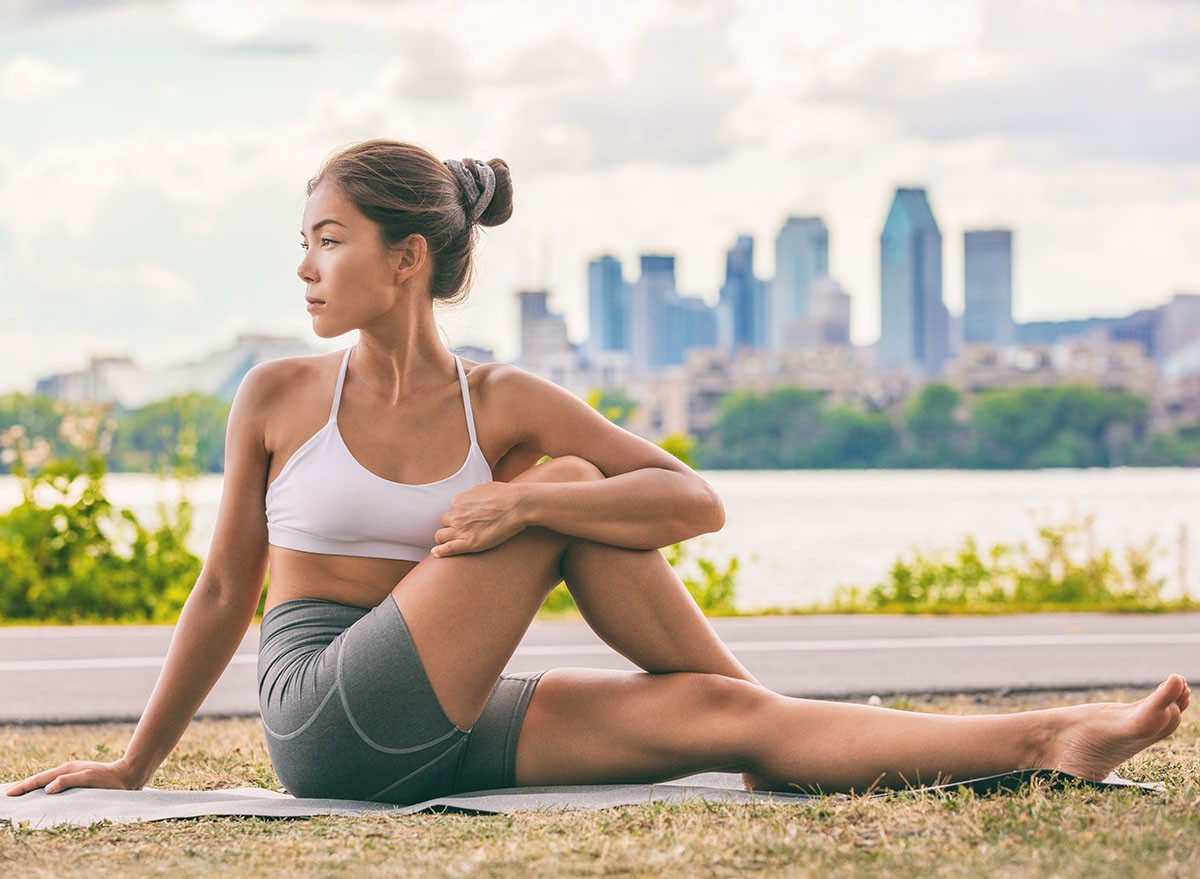
Seated Rotation For Upper Back Mobility
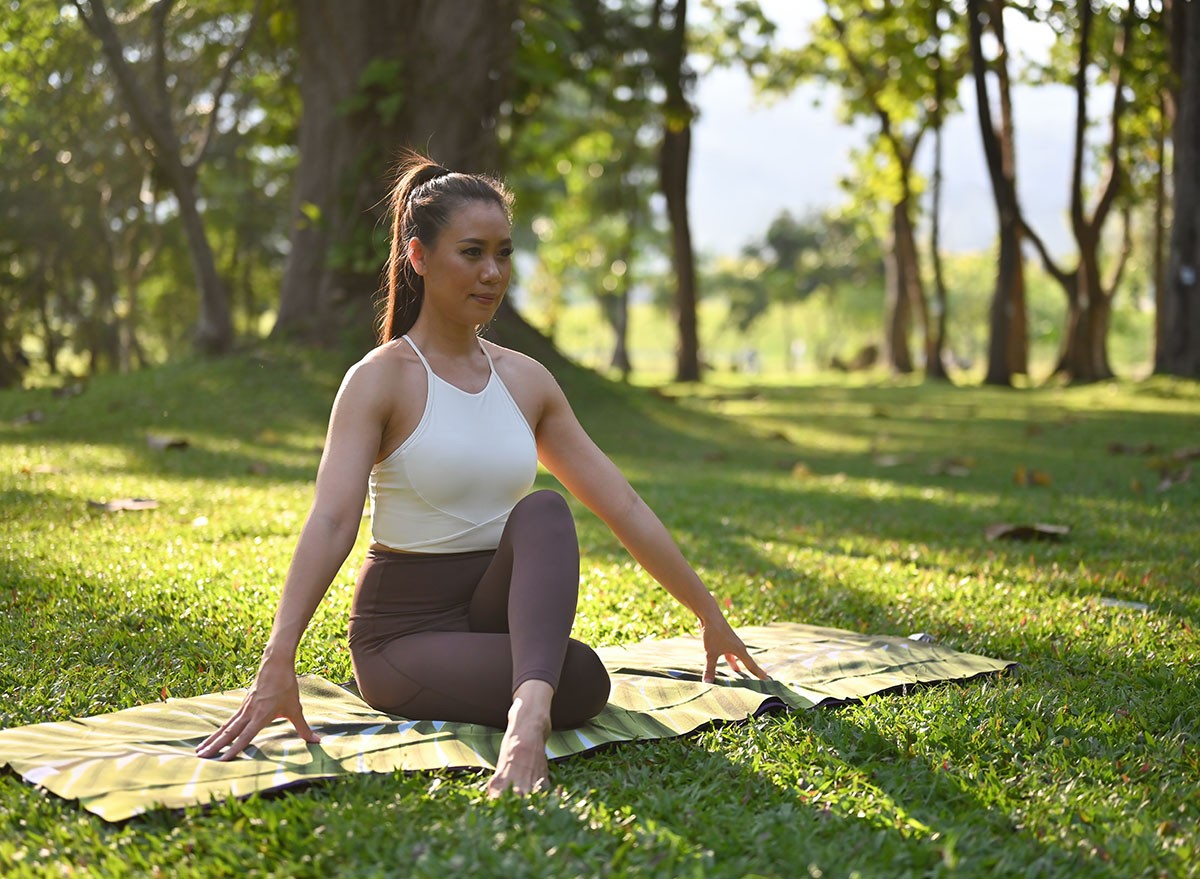
Moving up the spine, Jared demonstrates: "I'm going to cross my left leg over my right, my right elbow comes to the outside of my left knee just until I get a good stretch." He notes that this stretch often provides satisfying relief in the upper back region.
Child's Pose For Full Back Release
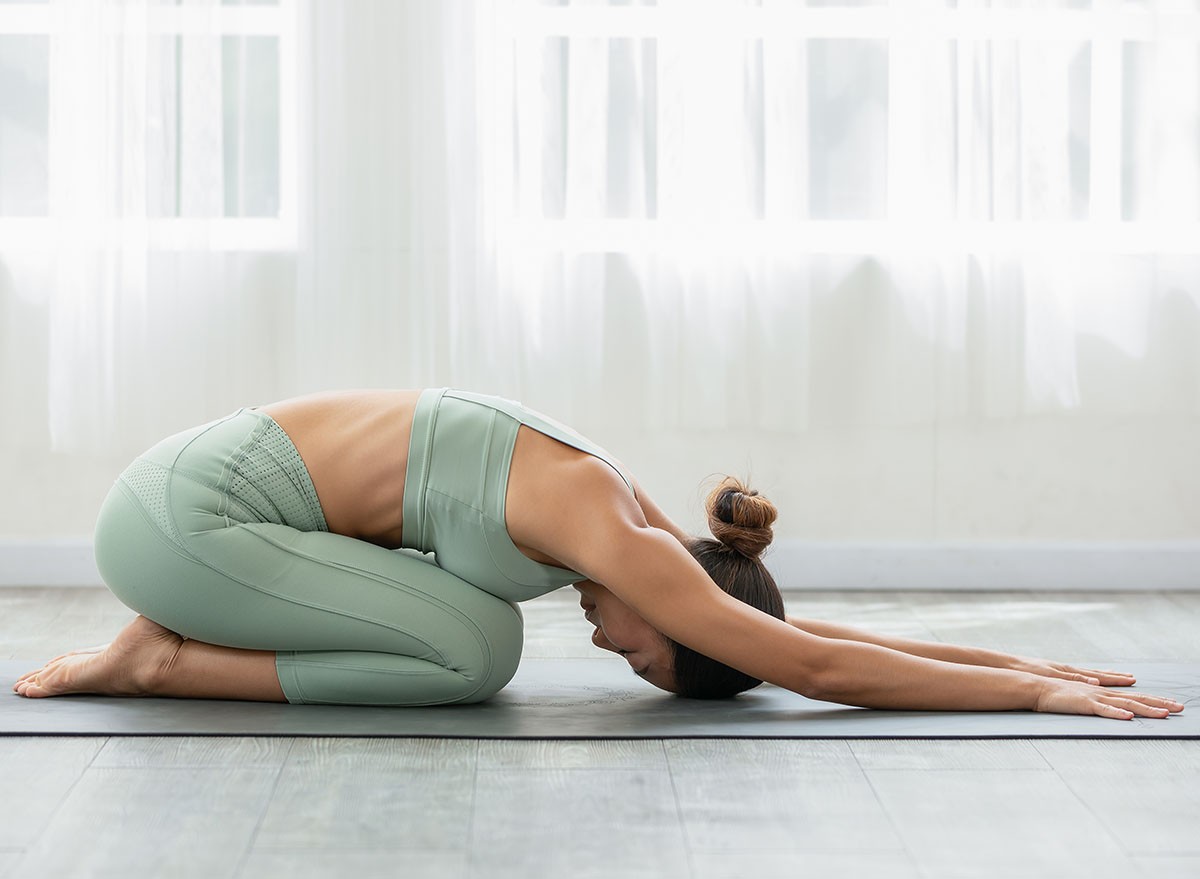
"This is one of my favorites for the entire back," Jared shares. The position is simple: "Come onto all fours. Sit your bottom down onto your heels until we get just a good stretch all through the back, through the lats. Tuck your chin into your chest and just sink into that stretch."
Upper Back Extension For Better Posture
This dynamic stretch targets your upper back and chest. "Place your fingertips to the back of your head, bring your elbows together and fold forward," Jared instructs. "Then we're going to open everything up, look up towards the ceiling, separate your elbows out, feel a good stretch through your chest."
Gentle Neck Stretch For Upper Body Relief
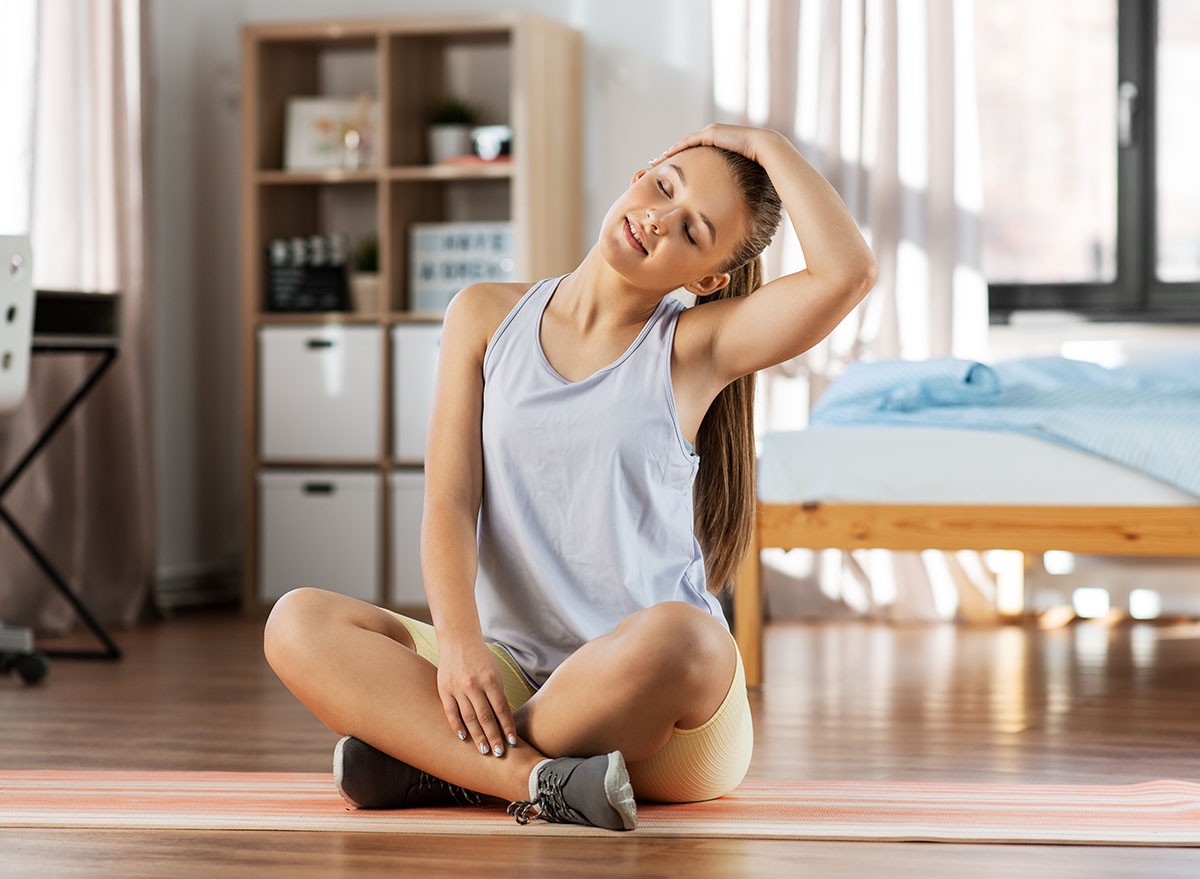
Conclude with neck mobility: "Left ear over towards your left shoulder. With your left hand come up to the opposite side of your head and apply just a gentle over pressure till we get a good stretch through the right side of the neck," says Jared. Repeat on both sides.
As Jared emphasizes throughout this routine, the key to success is keeping each stretch comfortable and consistent. This no-equipment-needed sequence takes just eight minutes but addresses every major muscle group in your body. Practice regularly, respect your body's limits, and watch your flexibility improve over time. nd if you enjoyed this article, don't miss these 3 Simple Stretches Made This Coach More Flexible in 2 Weeks.


